This is my Complete Build or Rebuild Website Guide. I follow these 12 phases every time to rebuild my website just after I reset a WordPress site. Naturally, this is part of my Setup WordPress Website & WordPress Plugins categories.
Introduction to the Rebuild Website Guide
Sometimes, if I’m getting ready to move to another web host, I’ll reset it and then the migration is easier and more efficient. I’ll also be assured that any hiccups occurring are not caused by my site itself with something “left over”. So, whenever I plan to look for a new host, I go over my article on “Website Requirements” to remind me of things to look for. Now, let’s proceed with the big change.
Use Rebuild Website Guide for How to Rebuild an Existing Website
I use this Rebuild Website Guide every time I finish a WordPress site reset. Also, I’ve already gone through the decision to reset it and rebuild it.
If you need a project related guide, see my post “Website Project Plan“. It shows an extensive list of items to consider.
Here are a few good posts on related topics like: how to rebuild a website, recreate a website, rebuild website in WordPress, and how to rebuild an existing website.
- On the decision of “Is It Time for a Website Rebuild? Here’s How to Know“.
- How to Redesign an Existing Website the Right Way
- How to Rebuild a WordPress Website
Use Rebuild Website Guide to Rebuild on Empty Startup WordPress Website
Also, I use this guide to recreate a website as a starting point, even when I’m creating a brand new WordPress website. In those cases, when I get to parts that reference restoring images or posts, I skip those steps until I’m ready for returning to them. Also, if I don’t think one of my common plugins isn’t needed on the brand new site, I skip that plugin’s step also.
For fresh installs of WordPress, any method is feasible such as from this list.
Use Rebuild Website Guide in Sequential Order of Steps
I’ve done dozens of resets and rebuilds in the past few years. And, I’ve changed the order of these steps several times until I now have it in the best sequence.
If you follow these sets of steps in order, you’ll experience the following:
- optimal time saved
- periodic phase backups to recover from partial mistakes on the site rebuild
- best performance metrics when fully done
1. Initial WP Admin Settings
Starting immediately with a clean reset and blank WordPress site, I’ll logon to my WP-Admin account and proceed as follows.
- From WP Admin, go to the Settings menu item and perform these initial important first tasks under each sub-menu item.
- General: These settings are mostly retained after the reset; however, go over them to verify because sometimes an item gets missed.
- Timezone: -UTC-4 (for EST)
- Do NOT apply the site icon at this time. That’s a much later step.
- Writing: Verify items and update if needed.
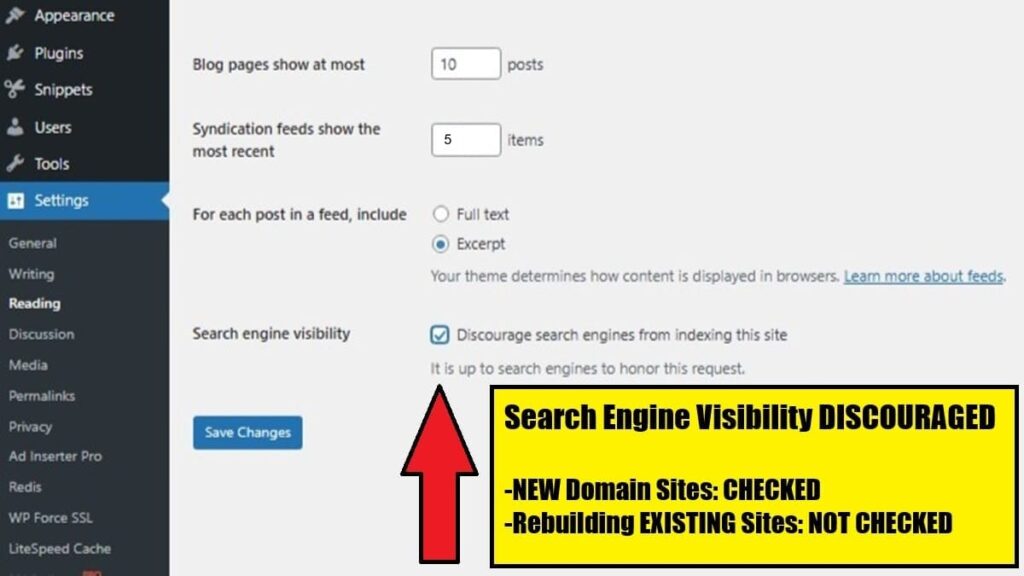
- Reading: These settings were potentially retained after the reset; however, go over them to verify.
- IMPORTANT: If working on a NEW domain site, ensure the “Search Engine Visibility (to discourage…)” is checked.
- Syndication feeds show the most recent: 5
- For each post in a feed, include: “Excerpt”
- General: These settings are mostly retained after the reset; however, go over them to verify because sometimes an item gets missed.
- Discussion: These settings were reset to defaults. Update them as desired. I use these:
- Other comment settings: uncheck “Enable threaded (nested) comments”.
- Before a comment appears: Check “Comment must be manually approved. Uncheck “Comment author must have a previously approved comment”.
- Tap <Save Changes>.
- Media: Uncheck “Organize my uploads into month- and year-based folder”. Then, tap <Save Changes>.
- Permalinks: Select option “Post name”. Then, tap <Save Changes>.
- Privacy: No actions taken.
- From WP Admin, go to “Posts”. Delete any posts and empty the trash.
- Repeat with “Pages” and empty trash.
2. Install 1st Set of Plugins
Since this is a fresh, reset clean site, some of the following plugins or steps might not be followed. So, it’s a consideration of each. They are put in my preferred sequence, covering all possible plugins I might use, due to past experiences.
Also, read my post “My WP Plugin List” for a clearer picture of lots of good plugins I’ve used in recent years. On that article I only list the ones that were good or great, whether I use them in my own current scenarios or not. I’ve tested hundreds. On this post here, however, I only show the plugins I use TODAY on any of my current sites. This listing is maintained in real time as I refer to it as my plugins checklist.
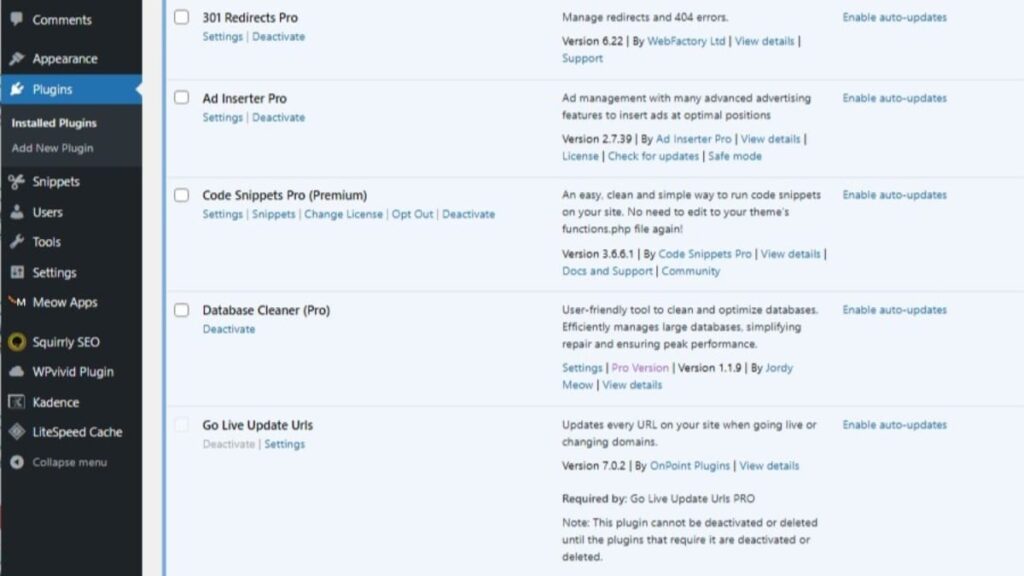
Now, I install these plugins and activate them so that the eventual settings’ imports (from the previous backups of exported saved settings) will work correctly. So, it’s important to note that importing settings does not take place until stated.
Database Cleaner Pro Install
Install and activate “Database Cleaner Pro”. There are no saved settings to reimport.
From WP Admin, go to “Meow Apps | Database Cleaner”. Then, tap the <Easy> toggle button to change it over to <Expert> mode. Don’t run any processes. However, perform the following tasks to clean up some residual data still left behind.
- Go to tab “Tables”. Go to bottom and tap to show “200 items per page”). Then, scroll back to the top and tap to show “Unknown”. Sort them by table name and scroll through them.
- If uninstall steps were followed using WP Reset plugin, there won’t be any excessive tables to delete. However, review the next step to check and remove any that might still exist.
- Only if this was a full “Nuclear Reset”, you might see some odd prefix names of tables. However, if you follow the clean uninstall of the WP Reset plugin, there won’t be any. If I forgot to do that step, there will be a lot of odd-named tables used by the WP Reset plugin. Just double-check to ensure they’re all named with an odd prefix. None will be 1 or 2; their prefix will be of many tables. There might be several sets of bulk odd-named tables. If so, I select them all and delete them (by tapping the red X at the top column).
- Go to tab “Options”. Tap to show “Unknown”.
- Delete items that start with “wp-reset…”. There might be 3.
- A few other items, if any, might be unassigned due to the default Database Cleaner not having a particular plugins table naming conventions. This is okay and is only a missed association in this plugin’s app.
301 Redirects Pro Install
- Install and activate “301 Redirects Pro” (aka WP 301 Redirects). No plugin updating and no importing of settings or rules yet.
- Proceed to go through opening wizard, changing no settings, to finish.
- Then, create a page titled “Temp Website Maintenance” with a quick note of temporary site maintenance for a few hours.
- Publish it. Don’t worry about any error about a theme not being present yet.
- Then, on this plugin, go to its Settings | General (tab).
- In “Redirect to URL on 404”, paste this domain’s URL: https://<DomainName>/temp-website-maintenance/
- Tap <Save Changes>
- Open “Database Cleaner” and apply unknowns in tab “Options” for assignments to “301 Redirects Pro” from this list.
- wf301_pointers
WPvivid Pro Install
This is an early step for security of a WordPress site and is referenced in my post “WP Security Check“. It will give you options to replace the entire site for discovered issues.
- Install and activate WPvivid Pro.
- From WP Admin, goto “WPvivid Plugin | Dashboard”. Follow these steps to install addons.
- Tap to install “Roles & Capabilities” addon.
- Tap to install “WPvivid Backup Pro Addon”. It will then show several added features on the dashboard.
- From WP Admin, go to “WPvivid Plugin | Settings”. In the “Backup” tab, scroll down to “Export/Import Settings” section. Proceed to import WPvivid previously saved settings file. Then, tap to <Save Settings>. You can also use another site’s WPvivid settings to start off with.
- Ensure it’s settings are set to retain at least 10 manual backups of files & database copies.
- From WP Admin, go to “WPvivid Plugin | Backup Manager”.
- In tab “Backups”, ensure <Scan> row of dropdown selections are “Cloud Storage”, “pcloud”, and “–“. Then, tap <Scan>. Any previous backups in storage will now appear.
- Repeat for showing any stored on localhost if needed.
- These settings will help to improve performance in cloud backups & restores:
- In Wpvivid, go to: Cloud Storage | Storage List. Then, click the gear icon of the pCloud storage. Change the “The block size of uploads and downloads…” = 20 MB (default is 2 MB). Increase this amount improves the UPLOAD & DOWNLOAD speed. However, if it starts to cause timeouts, reduce it down.
- In WPvivid, go to: Settings | tab “Backup (Advanced). In “Backup performance mode”, change the “Maximum PHP script execution time for a backup task” = 300 seconds.
- To prevent a PHP warning & to significantly improve upload and download performance using pCloud, set the web server “allow_url_fopen” to enabled. This is available via “MultiPHP INI Editor” (in “cPanel | Software” or in “Webuzo ADMIN: Apps | Edit PHP INI”). Also, change “max_execution_time” = 300 (default was 30).
- In Webuzo ENDUSER, repeat above PHP settings. They are located in “Configuration | PHP INI Editor”. Also, know that “allow_url_fopen” isn’t available for EndUser settings. Finally, ensure you repeat PHP settings as an ENDUSER for all Locations, selectable in the dropdown box.
3. Install Theme & Blocks
WordPress & Kadence Themes with Related Plugins Install
This will involve the default WordPress theme and the Kadence theme with related plugins.
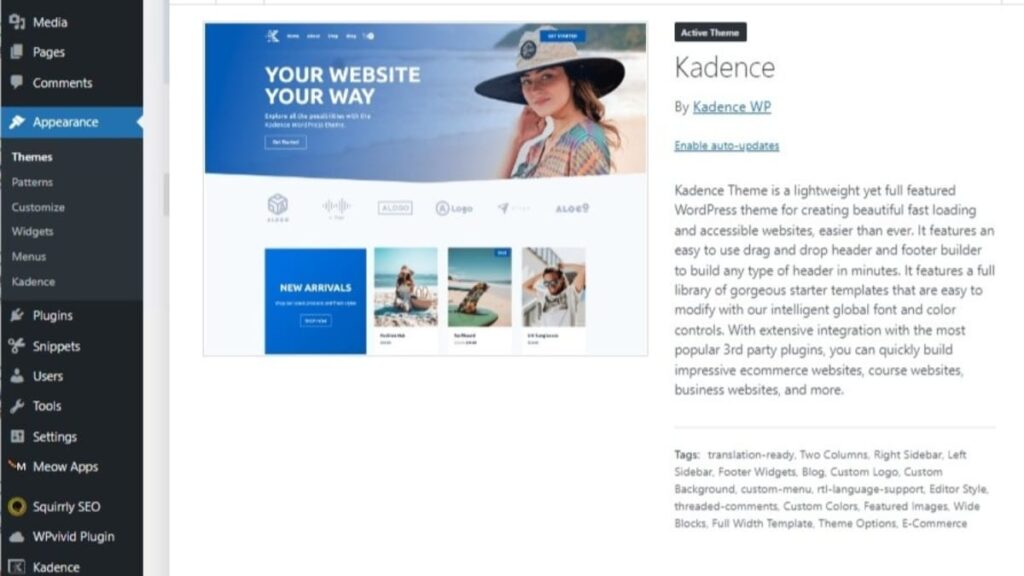
WordPress Default Theme Install
- From WP Admin, go to Appearance | Themes. Tap <Add New Theme>
. - There might be a theme directory error shown. This is a remnant of the recent site reset and it goes away after the next steps.
- Install and activate the most current default WordPress original theme, usually named with a year. If nothing happens after tapping <Activate> I just refresh the screen. This always happens to me after a site reset.
Kadence Theme & Kadence Blocks Install
From WP Admin, go to Appearance | Themes. Tap <Add New Theme>
- Install and activate the “Kadence” theme.
- When prompted, I install and activate the Kadence AI Starter Templates.
- Kadence Theme Pro – Premium Addon for Kadence Theme: Install & activate.
- Install Kadence Blocks via WordPress (free) – It shows as “Gutenberg Blocks with AI by Kadence…”
- Kadence Blocks – Pro Extension: Install & activate.
Import Users from Backup
- From WP Admin, go to “WPvivid Plugin | Backup Manager”.
- Locate the last full backup before the reset. Tap the Restore icon (double arched arrows).
- If <Retrieve to local host> is displayed, tap it.
- When ready, don’t change any “Advanced Settings”. Just tap <Next Step>.
- Then, tap to unselect all of the items in “Files and Folders”.
- Tap the down arrow of “Databases”.
- Unselect “All Tables”.
- Scroll to locate and select only tables “users” & “usermeta”.
- Then, tap to <Restore Now> and when done, verify current users shown.
- IMPORTANT: After this import, I also have to reactivate a lot of the plugins.
- Then, I check for new unknowns to be assigned in Database Cleaner.
- The “kt…” item is assigned to “Kadence Pro…”.
- The new “cron_backup_count” & “wp_vivid…” items are for “WPvivid Backup Plugin”.
Take Manual Site Backup 01
- Take a manual backup using WPvivid and name the comment: “01After1stSetPluginsUsersAndThemeRelatedInstalls”.
- Then, download it locally.
4. Install 2nd Set of Plugins
Code Snippets Pro Install
- Code Snippets Pro: Install and activate. Update, if prompted.
- Under the tab “All Snippets”, select all of them and select the Bulk action to delete them.
- Then, at the top, tap <Import> and follow the steps to reimport in the saved snippets file.
- Activate desired items from notes kept during the export process.
Go Live Update Urls Pro Install
- Install and activate “Go Live Update Urls” plugin via WP (free).
- Then, install & activate “Go Live Update Urls PRO” plugin.
Independent Analytics Pro Install
- Install & activate “Independent analytics Pro”.
- Import Data Steps:
- Disable the plugin.
- Go to Database Cleaner in the “Tables” tab. Tap on Unused and select all the “Independent Analytics” named tables. Delete them.
- Use WPvivid to restore selected tables with name showing “independent analytics” in them. Double check to ensure I have all of them.
- Important: After that import, reactivate all the plugins that were just deactivated.
- Then, from WP Admin, go to Analytics | Settings and import in the saved settings as follows.
- For Reports: If I did an import of all the data tables, the reports will be done. But, if not, here’s the manual process.
- Scroll down near the bottom to the section “Import Report Settings” & follow my custom plugin post install procedure (insert settings steps here).
- For Settings: There is no backup of settings to import. So, follow the locally saved checklist to manually reapply the settings. This is important as it references items to prevent false views data. (List those steps here).
- Open “Database Cleaner” and perform assignments based on the following named items.
- tables with naming like “…_independent_analytics…”
- options starting with “iawp_…”
- cron jobs starting with “iawp_…”.
- For Reports: If I did an import of all the data tables, the reports will be done. But, if not, here’s the manual process.
Redis Object Cache Install
- Install and activate “Redis Object Cache” via WP (free plugins).
- Then, tap to <Enable Object Cache>.
- Finally, tap to <Flush Cache>.
WordPress Importer Install
- Install “WordPress Importer” via WP (free). There are no settings.
WP Force SSL Pro Install
- Install & activate “WP Force SSL Pro”
- Settings can’t be exported. So follow these manual settings to reapply.
- From WP Admin, go to “Settings | Force SSL Pro”.
- In tab “License”: apply license and <Save & Activate License>.
- In tab “Settings”, change status as listed here.
- Enable “Fix mixed content in frontend”.
- Enable “Fix mixed content in backend”.
- Enable “Enable HSTS”.
- Disable “Force Secure Cookies”.
- Disable “301 Redirect HTTP to HTTPS requests via htaccess”.
- Disable “301 Redirect HTTP to HTTPS requests via PHP”.
- Enable “Cross-site scripting (X-XSS) protection”.
- Enable “X Content Type Options”.
- Enable “Referrer Policy”.
- Disable “Expect CT”.
- Disable “X Frame Options”.
- Enable “Permissions Policy” and then tap <Configure Policy> to <Save permissions policy> for all “allowed” items.
- Enable “Show WP Force SSL menu to administrators in admin bar”.
- Then, tap <Save options>.
- In tab “SSL Certificate”: In section “Real-Time SSL & Site Monitoring”, enter in the admin’s email address and tap <Save>.
- In tab “Content Scanner”: tap <Start Scanning>. Allow it to finish.
- In tab “Status”: tap <Run Tests Again>. Brief wait to finish.
WordPress Recipe Maker Install (Recipe Sites)
If a recipe site, install and activate the base plugin via WP (free), followed by the higher level plugin (supreme or elite). Settings and imports are addressed later.
Take Manual Site Backup 02
- Take a manual backup using WPvivid and name the comment: “02After2ndSetPluginsInstallsB4Content”.
- Then, download it locally.
5. Import Exported Content, Media, Views
Import in available content with media using the following options. Or, optionally, you can start over by reviewing “How Many Pages Should a Website Have?” and “Navigation Pages for Header and Footer“.
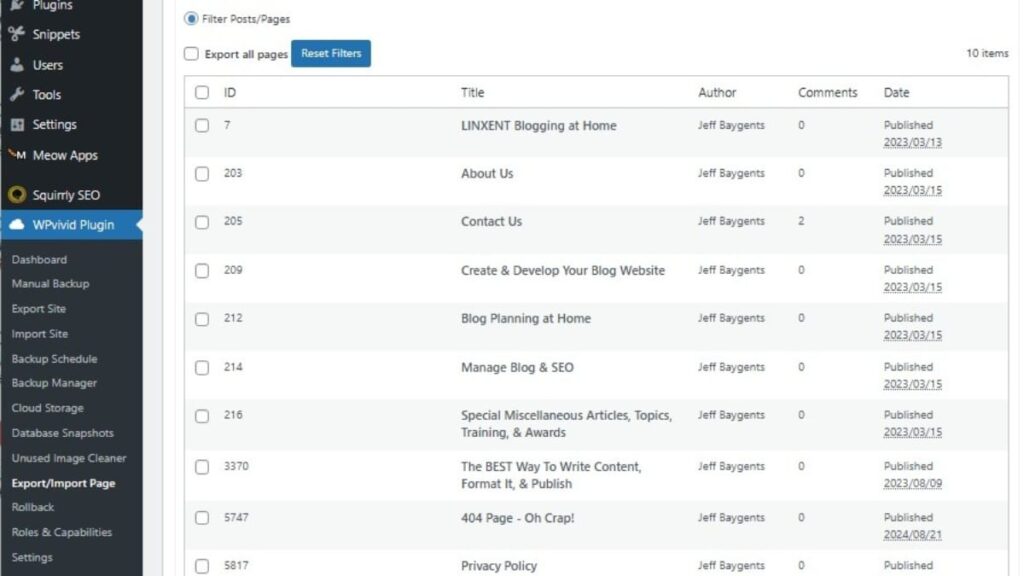
- Option 1, Part 1: Use WPvivid Backup Pro.
- From WP Admin, go to “WPvivid Plugin | Export/Import Page”. It will include its images and taxonomies.
- Go to tab “Import”. Tap <Upload and Import> which prompts to then point to 1 locally saved, previously exported file of pages or pages (saved according to each author).
- When each is imported, when prompted, assign to an existing author.
- Repeat import process until all desired posts and pages saved files are reimported and assigned to an author.
- Notes on Categories: The URL path to categories defaults to include “/category/”. So, there will be broken Category URLs until after the SEO is setup to remove that portion of the URL path (“/category/”).
- Notes on Comments: They are restored correctly along with the posts & pages.
- Notes on Media: are restored if attached to content like pages and posts (but not to Site or when used as inline images). They may have to be restored manually as discovered.
- Actions After Importing pages & posts: From WP Admin, go to “WPvivid Plugin | Export/Import Page”. Tap <Delete Imported Files in the Folder (xxxB)>. There’s a small amount still shown which is just a log size.
- Finally, I’ll get in the Database Cleaner and assign a new unknown Option named like “wpvivid_list_cache” assigning to “WPvivids plugins pro”.
- Option 1, Part 2 (if a recipe site): Use WP Recipe Maker
- It’s extremely important that all the posts and pages are already imported (and that they include the comments & ratings). The previous option does this.
- Using WPRM, Import in custom templates (a copy-and-paste text file method).
- Manually adjust settings (no import/export method). I use saved screenshots.
- Using WPRM, go to “Import Recipes”.
- Tap “Import Recipes from JSON”.
- Select option “Edit existing recipes, using SLUG field to match…”. Then, tap <Choose File> to load your locally saved recipes with ratings file, and tap <Import JSON>.
- After finished, the recipes are loaded and matched with posts/pages.
- Check in WPRM “Manage” and ensure ratings are showing there. If not, go to WPRM “Tools” and tap to <Find Recipe Ratings>. That always has fixed it for me.
- Go to WPRM “Manage” and check authors assigned to recipes. If there are any misassigned, follow these steps.
- Filter in the author that’s misassigned.
- Tap to edit an individual recipe.
- In section “Post Type”, reassign the “Post Author” with one of the users available.
- In next section “General”, reassign “Author” to “Name of post author”, or another option like “Custom author name” and then enter it in.
- Tap <Save and Close>. Then, repeat steps for each recipe with a misassigned author.
- Option 2: Use WordPress exports.
- From WP Admin, go to “Tools” | Import. Then, in section named “WordPress”, tap to “Run Importer”. Follow the prompts to reimport previously saved WP exported items individually as appropriate.
- For media, paths to images are reimported but you’ll need the original images (in “uploads” folder) uploaded back. So, if downloaded previously, go ahead and upload them back into the same folder location: public_html | wp-content | uploads.
Take Manual Site Backup 03
- Take a manual backup using WPvivid and name the comment: “03AfterImportingContentMedia” or (if recipe site) “03AfterImportingContentMediaRecipes“.
- Then, download it locally.
6. Initial Rebuild Website Functions
- Assign site key pages, as follows:
- From WP Admin, go to Settings | Reading. From “Your homepage displays”, select option “A static page…” and then assign it to “Homepage” from the dropdown choice. Repeat with the “Blog” page, if exists.
- From WP Admin go to “Settings | Privacy”. Then, in “Change your Privacy Policy page”, select the Privacy Policy page from the dropdown and tap <Use This Page>.
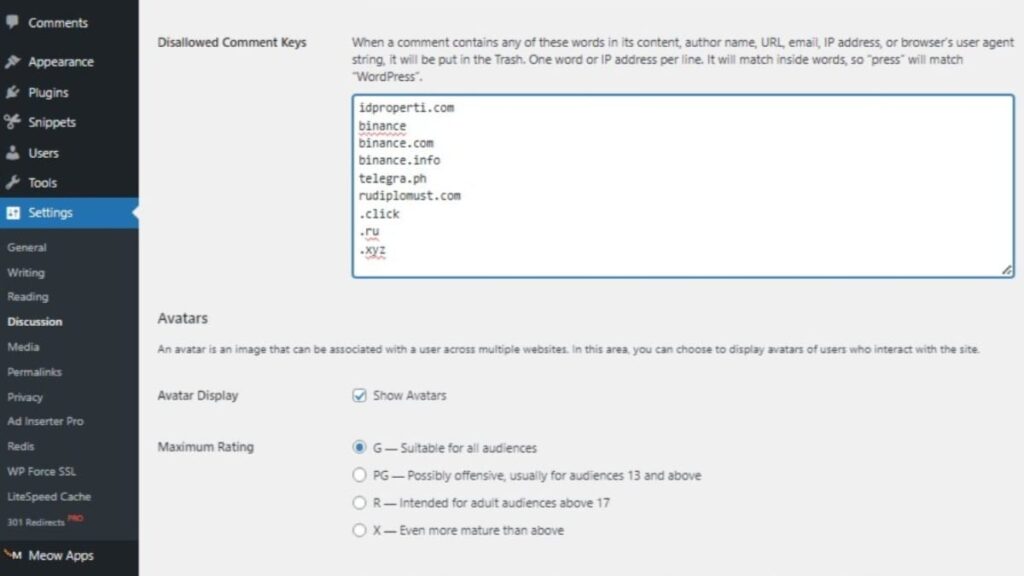
- Reapply Comments settings. From WP Admin, go to Settings | Discussion.
- Under “Disallowed Comment Keys”, paste back the list from the previously saved text file (before site reset) named “Disallowed Comment Keys.txt”.
Content Views Install
If using or restoring its grid management only, install and activate Content Views Pro. It requires using the WP base plugin (free) first, which is already installed.
- From WP Admin, go to “Tools | Import”. Tap <Run Importer> and select the previously saved “Views” backup file. This reinserts all the Views in the Content Views plugin.
- From WP Admin, go to “Content Views | Replace Layout”. Update the settings manually of each item. This is based on a local settings file I have.
- Finally, each category and tag will need to have their image reimported manually. The pics are saved within each local folder for each tag and category. However, this can be a task scheduled for later so that the site layout can be quickened.
Update 301 Redirects Pro Settings
- From WP Admin, go to “Settings | 301 Redirects .
- Tap the main tab “Settings” and then the subtab “Tools”.
- Follow the Imports section to <Browse> for the previously saved redirects file and tap to <Upload> it into the plugin.
- IMPORTANT STEPS:
- Remove the URL entry from “Redirect to URL on 404”. Tap <Save Changes>.
- Then, delete the site’s temp page named “Temp Website Maintenance”.
Files and Folders Cleanup
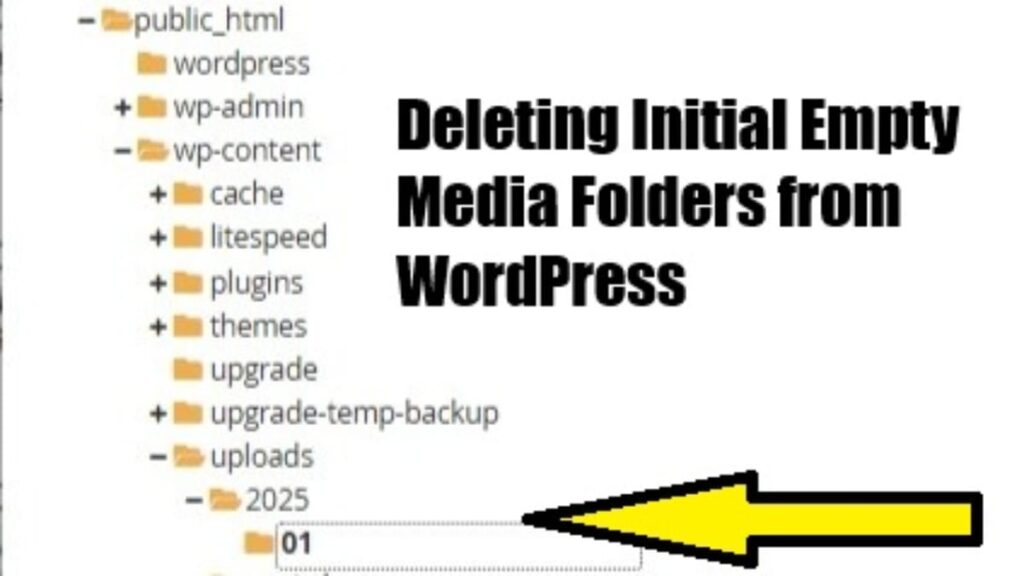
- Use cPanel’s File Manager or other tool for managing files and folders on the website’s server.
- Media dated folders: Look in the site’s uploads folder “public_html | wp-content | uploads”. If empty, delete possibly existing year/mo folders. If they did exist there, recheck to ensure your WordPress media setting (Settings | Media) does not have “Organize my uploads into month- and year-based folders” option checkmarked.
- WP Reset folders: Look in the site’s wp-content folder “public_html | wp-content”. If no longer using WP Reset plugin, I delete the folders named “wp-reset-autosnapshots” & “wp-reset-snapshots-export”. Those folders might will also contain files I no longer needed.
7. Restore or Rebuild Website Appearance
These are the final items to restore or reconstruct the site appearance. They are shown in case there’s no Kadence theme customize settings to import back in. Also, not all items are saved in the Kadence theme settings so it will have a basic semblance of restoring the site appearance.
1. OPTIONAL: Restore Theme Settings
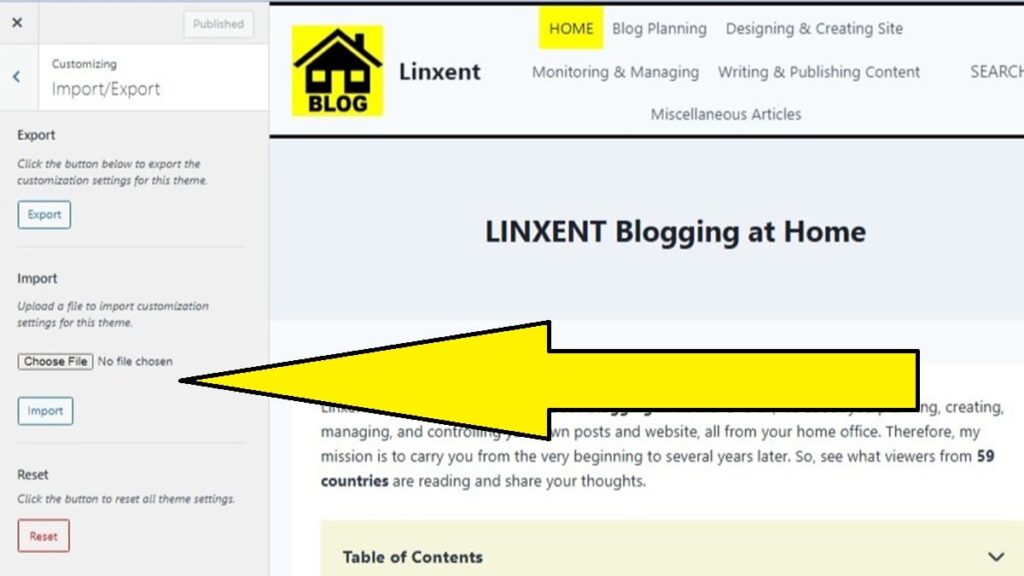
- From WP Admin, go to :Appearance | Customize | Import/Export”. If the look to retain the previous theme appearance, I’ll import the previously saved theme settings.
- Tap <Publish>.
- Note: Even if previous theme settings are reapplied, continue to go through remaining sets of steps to confirm or apply a lot of the settings that don’t get changed.
2. Apply Site Identity Items
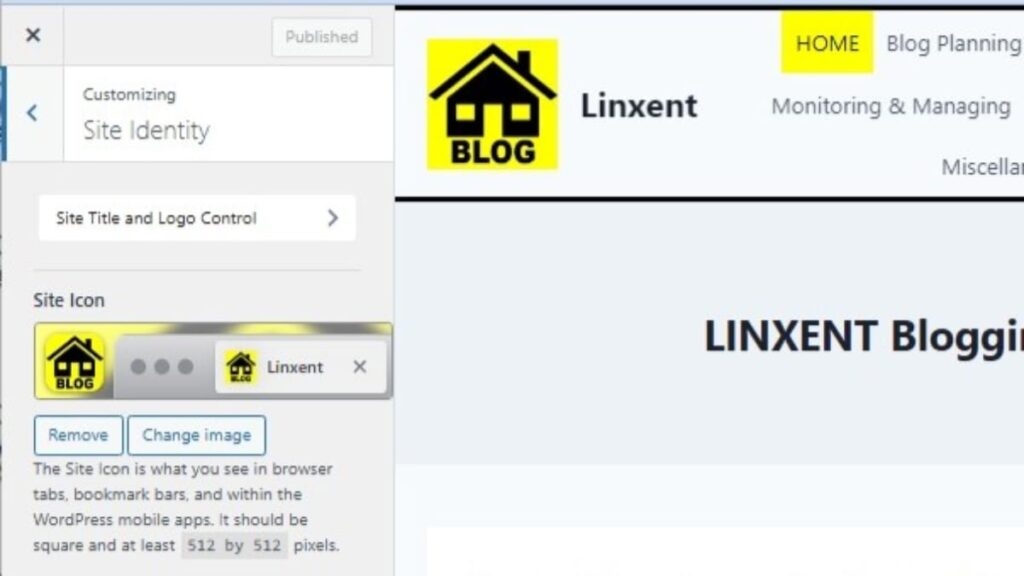
- From WP Admin, go to :Appearance | Customize | Site Identity”.
- I tap to assign the site icon first with a manual upload.
- It’s 512×512 px file named “my site icon.png” (and assigned all descriptive text: “my site icon png”).
- Then, I tap <Site Title and Logo Control> and assign the site logo with a manual upload.
- It’s 512×512 px file named “my site logo.png” (and assigned all descriptive text: “my site logo png”).
- For “Logo max width”, I tap each device icon and assign: Desktop 100, Tablet 75, & Mobile 50
- For “Logo Layout”, I usually tap “Logo & Layout” and tap the 1st option that puts the logo on the left & title on the right.
- Tap <Publish>.
3. Update or Recreate Navigation Menus
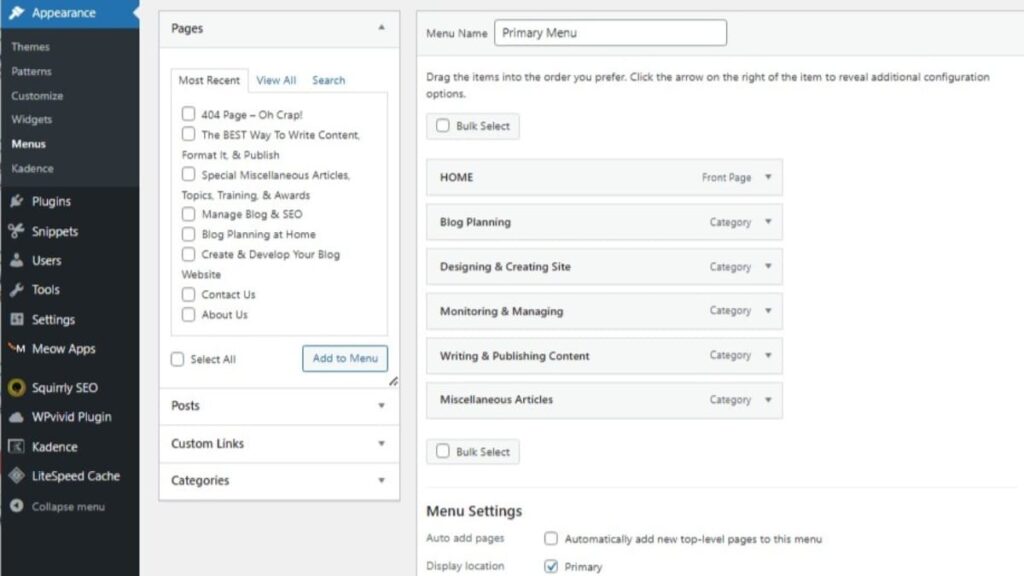
- From WP Admin, go to “Appearance | Menus”.
- If the needed menus don’t exist, they will need to be recreated. Generally, I name the header menu “Primary Menu”. And, I name the footer menu “Footer Menu”.
- After both menus are created, tap the menu’s “Locations” tab.
- Assign the Primary Menu to locations of “Primary” and “Mobile”.
- Assign the Footer Menu to location of “Footer Menu”.
- Tap <Publish>.
Proceed to the next steps for adding these navigation menus back into the correct locations in the header and footer template sections.
4. Update the Kadence Header and Footer
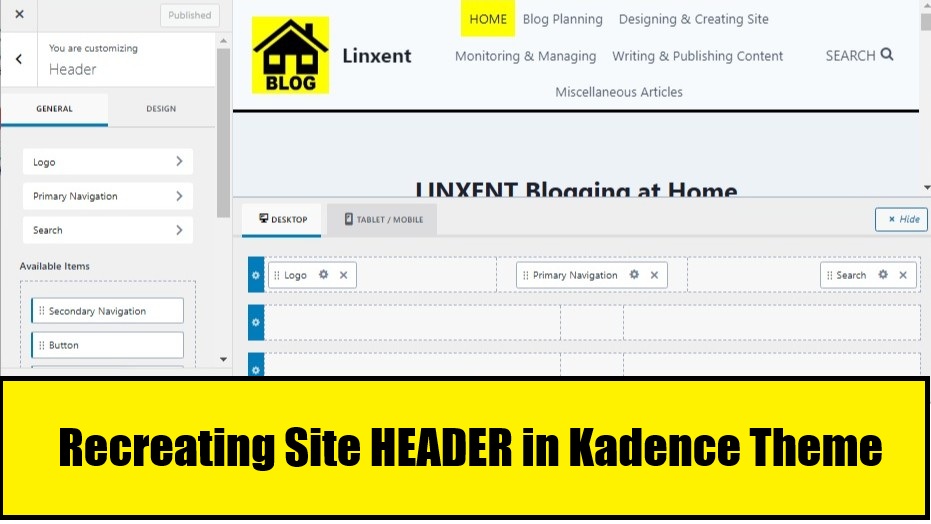
- From WP Admin, go to “Appearance | Customize”.
- In Header’s tab “General”, here are the layouts, each specific to Desktop and Table/Mobile views.
- Header DESKTOP Layout
- Row1: empty
- Row2: col 1 (Logo), col 2 (Primary Navigation), col 3 (Search)
- Row 3: empty
- Settings: tap config wheel icon on “Search” object. Populate “Search Label” with: Search
- Header MOBILE Layout
- TABLET/MOBILE Layout:
- Off Canvas: Mobile Navigation
- Row 1: empty
- Row 2: col 1 (Logo), col 2 (empty), col 3 (Trigger, Search Toggle)
- Row 3: empty
- Settings: tap config wheel icon on “Trigger” object. Populate “Menu Label” with: Menu
- Header DESKTOP Layout
- In Header’s tab “Design”, here’s a list of settings to change.
- Screen size to switch to mobile: 800
- Tap <Publish>.
- Go back to main Customize menu and tap “Footer”. Here are the layouts, each specific to Desktop and Tablet/Mobile views.
- Footer DESKTOP Layout
- Row 1: empty
- Row 2: col 1 (Footer Navigation), col 2 (empty), col 3 (Social)
- Row 3: col 1 (empty), col 2 (Copyright), col 3 (empty)
- Settings Note 1: Replace text in existing footer “Copyright” object.
- Settings Note 2: In “General | Social Links”, populate social media URLs that match footer social icons. Also, populate admin’s email address text box.
- Footer TABLET/MOBILE Layout
- Row 1: empty
- Row 2: col 1 (Footer Navigation), col 2 (empty), col 3 (Social)
- Row 3: col 1 (empty), col 2 (Copyright), col 3 (empty)
- Settings: (no changes)
- Footer DESKTOP Layout
5. Update Final Kadence Theme Settings
This is for the rest of updating Kadence theme settings.
- From WP Admin go to “Appearance | Customize”:
- Colors & Fonts | Colors:
- Content Links | Links Color: Hover = Global Pallet color looks like black
- Tap <Publish>.
- Colors & Fonts | Colors:
- From WP Admin go to “Appearance | Customize | General”:
- Scroll To Top (“General” tab):
- Enable “Enable Scroll to Top”
- Scroll up icon: Select the bold far-right one.
- Visibility: Ensure all 3 device types are selected
- Tap <Publish>.
- Comments: Enable these.
- “Move Comments input above…)”
- “Remove Comments Website field”
- Tap <Publish>.
- Performance: Enable these.
- “Enable Microdata Schema”
- “Enable Scroll to ID”
- “Enable CSS Preload”; however, IMPORTANTLY, disable it when using a cache plugin.
- Tap <Publish>.
- Scroll To Top (“General” tab):
- From WP Admin, go to “Appearance | Customize | Posts/Pages Layout”
- Single Post Layout (“General” tab):
- Title Elements section: Enable Breadcrumbs (but disable “Show Post Title in Breadcrumbs”)
- Featured Image Position section: Select “Below”.
- Featured Image Ratio section: Select “16:9”.
- Disable remaining 5 items in this section.
- Tap <Publish>.
- Single Post Layout (“General” tab):
- From WP Admin, go to “Appearance | Customize | Import/Export”
- Tap <Export> and save this theme’s settings file.
8. Finalizing Missing Unattached Media
As you might eventually observe, some inline images or other media might not show up in various locations. Sometimes, just uploading the missing media (using the exact name shown in the media’s link) will work. If not, delete the missing media’s block and and manually add it back in as a new block using a newly uploaded media file.
Take Manual Site Backup 04
- Take a manual backup using WPvivid and name the comment: “04AfterAppearanceBeforeSEOorCacheOrAds”.
- Then, download it locally.
9. SEO Setup
The following includes options for a fresh SEO setup or one using a restoring of previously saved settings.
- Note: The SEO setup will fix the Category URLs to remove “/category/” from their URLs path.
- Option 1: Install, activate, switch to “expert mode”, install “Advanced Pack” (when prompted at SEO Main Menu), and “restore” all exported settings for SEO.
- Option 2: See the “How to Setup Squirrly SEO” article for a fresh, new installation and setup.
Also, after applying your SEO Setup, it’s important to perform a technical audit for broken links as mentioned in my “Internal Link Building SEO Guide“.
10. Caching Plugin Setup
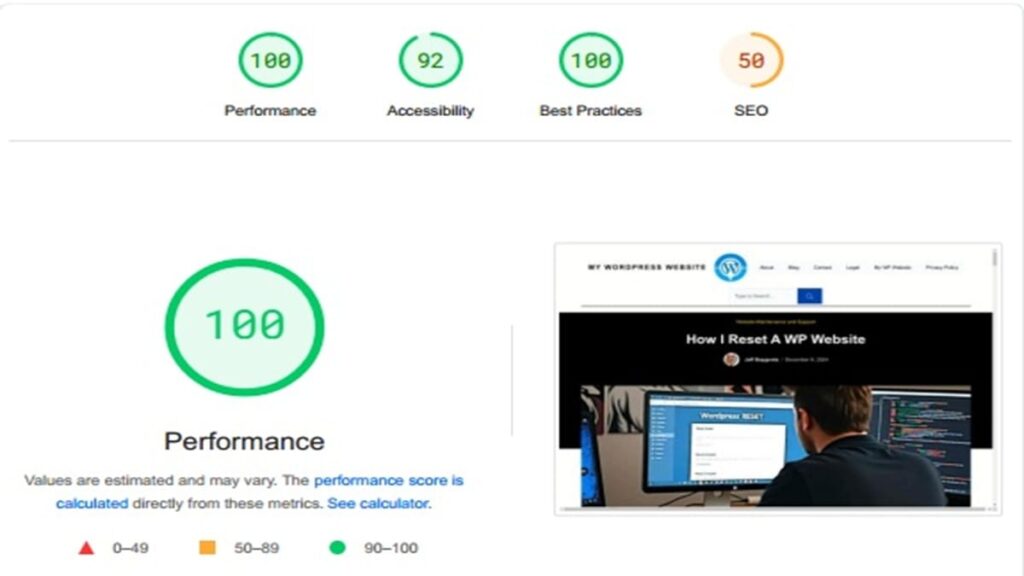
Test performance metrics before setting up caching. This is just to ensure any oddities might be caught beforehand.
Also, after installing a caching plugin, check Database Cleaner for any unknowns to assign. After setting up LiteSpeed plugin, for example, has 1 item needing assignment in the “Options” tab of Database Cleaner.
- Professional Caching Plugins & CDN:
- LiteSpeed (currently used)
- PerfMatters
- FlyingPress
- Common Caching Plugins
- WP Fastest Cache
- WP Optimize
- Rocket
- Newer Caching Plugins
11. Perform Broken Link Audit
I perform a final check (broken links check for 404 errors) to ensure all internal and external links are working.
12. Advertising Install
Ad Inserter Pro Plugin Install and Restore.
- If this reset is beyond just a plugin site reset, copy back the public_html ad files for site identity in the root folder “public_html”. If reset is from WP Reset plugin, those files are still there.
- Install & activate the “Ad Inserter Pro” plugin.
- Press the Cogwheel icon and tap “Administration”. Then, enter license key and tap <Save Settings>.
- Then, tap on Up/Down Arrows icon and select checkbox “Import plugin settings”. Paste in replacement text with saved settings text and tap <Save Settings>.
- Check database cleaner for any unknowns to assign.
- After a few minutes, check to site to see if ads are working again.
Take Manual Site Backup 05
- After Caching, Basic SEO, and Broken Links checked, take a manual backup using WPvivid and name the comment: “05AfterFinalRebuildSite”.
- Then, download it locally.
- Moving forward, I now rely on the scheduled backups to continue for future site changes and fixes.
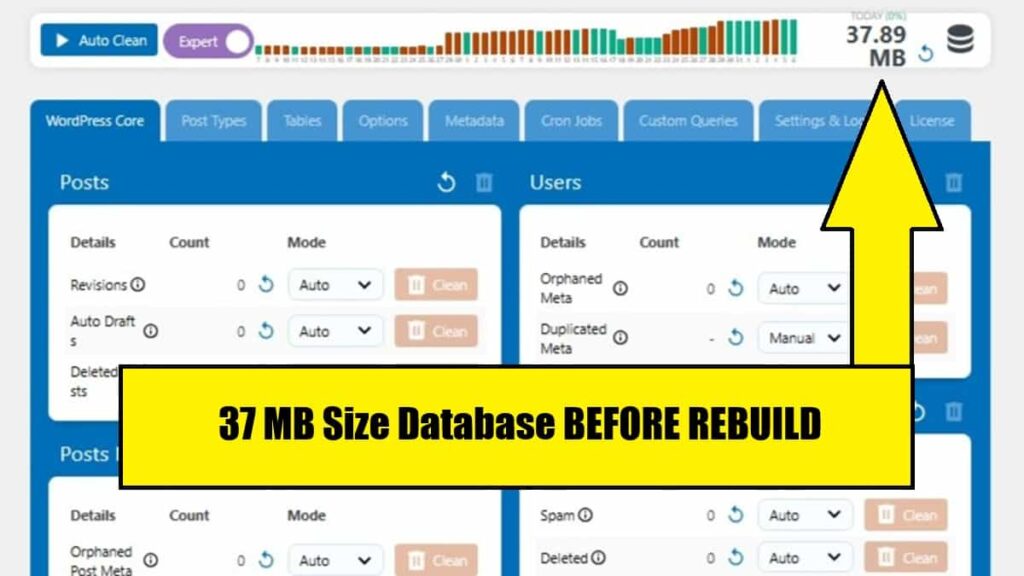
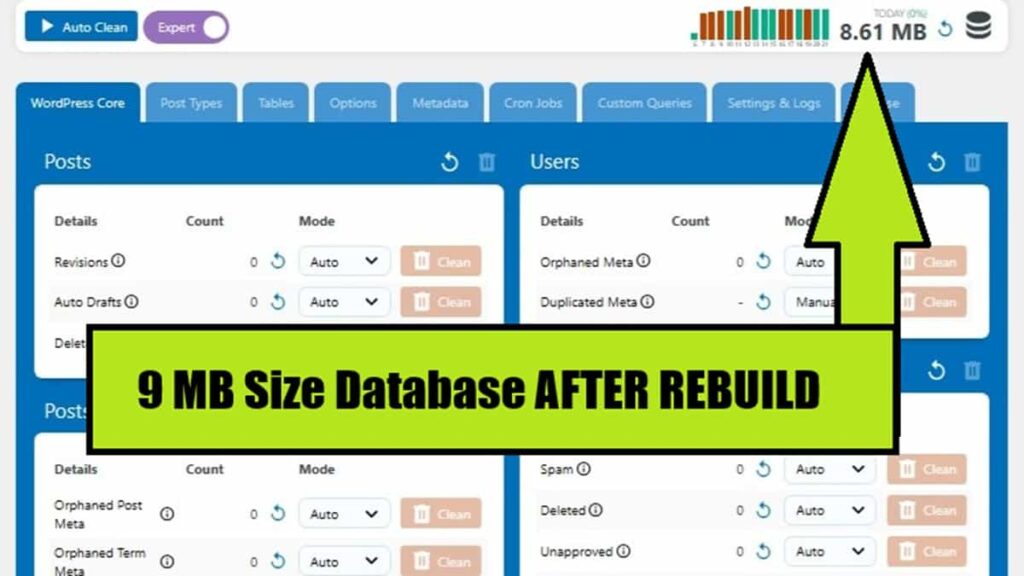
Size Improvement Before & After Rebuild Website in WordPress
Conclusion of the Rebuild Website Guide
You’ve now seen all the completeness of my Rebuild Website Guide. You’ve learned you can use it also to just setup a starting WordPress site. It covers getting you site logo and icon placed, your initial navigation menus on the header and footer, and even all the listed plugins installed. Finally, you’ve seen how flexible your options are with each phase covered. Share your comments on this vast topic with your experiences.

