BerqWP is one of the newest, cost-effective, and easiest to use optimization plugins for WP sites. And, it even includes a CDN. Keep reading to see how it can be setup to start using in 2 minutes. This is a part of my Recommended Plugins & WordPress Plugins categories. Also, it’s referenced in posts such as my “Rebuild Website Guide“, “My WP Plugin List“, & “Website Requirements“.
Overview of Initial Berqwp Plugin Usage
The Berqwp plugin is simply a matter of installing, activating, and enabling it to start. However, there are some initial requirements to set before installing.
Before Installing – Requirements & Recommendations
- This cannot be used on a WordPress “headless” site.
- Disable caching on web hosting server.
- If needed, add Plugin’s Service IP address (137.184.121.65) to whitelisting on web hosting server and onto any security related plugins.
- Deactivate and delete any caching or optimization related plugins. However, it is compatible with Redis Object Cache so that can remain intact.
- Disable any performance enhancement or lazy loading settings on any theme or other plugin settings.
Nexter Theme Settings Before Installing Berqwp
- For Nexter Blocks, confirm the following options. From WP Admin, go to “Nexter Blocks | Dashboard”.
- Extra Options | Performance
- Asset Manager
- Select option to be “Smart Optimizer (Recommended)”.
- Then, tap <Purge All Assets> and confirm <OK>.
- Then, change option to be “On Demand Assets”.
- Disable “Delayed 3rd Party JS”
- Disable “Defer CSS & JS”
- Asset Manager
- Extra Options | Performance
- For Nexter Settings, confirm the following options. From WP Admin, go to “Nexter Settings | Dashboard”.
- Performance | Advanced Performance (tap cog wheel icon)
- Ensure “Defer CSS & JS” are disabled. Then, tap <Save>.
- Performance | Advanced Performance (tap cog wheel icon)
Installing BerqWP Plugin
It’s a standard base plugin via WordPress. However, you can’t just enter in “berq”; it must be “berqwp“. Also, when using search engines for more info on this, you’ll want to avoid just typing “berq”. After installing, activate it, and enter license key if you have one.

Using Berqwp CDN
Before you use that CDN checkbox to enable CDN, read through the following steps to make it a smoother transition if you’re currently on another CDN or using other Nameservers.
Nameserver Considerations before using Berqwp CDN
If using any customized Nameservers for CDNs, repoint them back to your default Nameservers.
Also, after you change Nameservers, it’s best to wait about 24 hours for a better propagation assurance. However, I have done this without the wait but ONLY if I changed away from litespeed CDN, following these steps now given next.
LiteSpeed CDN Changes to use Berqwp’s CDN
There’s no nameserver changes required to point to Berqwp’s CDN. However, before enabling to use Berqwp CDN, you shouldn’t be pointing to another CDN’s nameservers.
So, if using LiteSpeed’s CDN, go to your QUIC.cloud settings for this domain and remove all things related to LiteSpeed usage by following these steps. They worked very well for me after my many attempts to determine the correct steps in the following order.
- First, repoint your domain to your host’s assigned NameServers of your domain.
- After testing to ensure your site is pointing to newly corrected DNS, then you can delete the DNS Zone for that domain shown in QUIC.cloud.
- After that, in BerqWP, you can select the checkbox to enable to use BerqWP CDN.
BerqWP Settings After Installing Plugin
Know that the settings can’t be exported or saved. So, before you perform any WordPress Site Reset, you should write down the settings.
For beginning, here are my recommended starting settings. You’ll slowly want to lower its mode or make some custom changes on your own as you discover any site concerns.
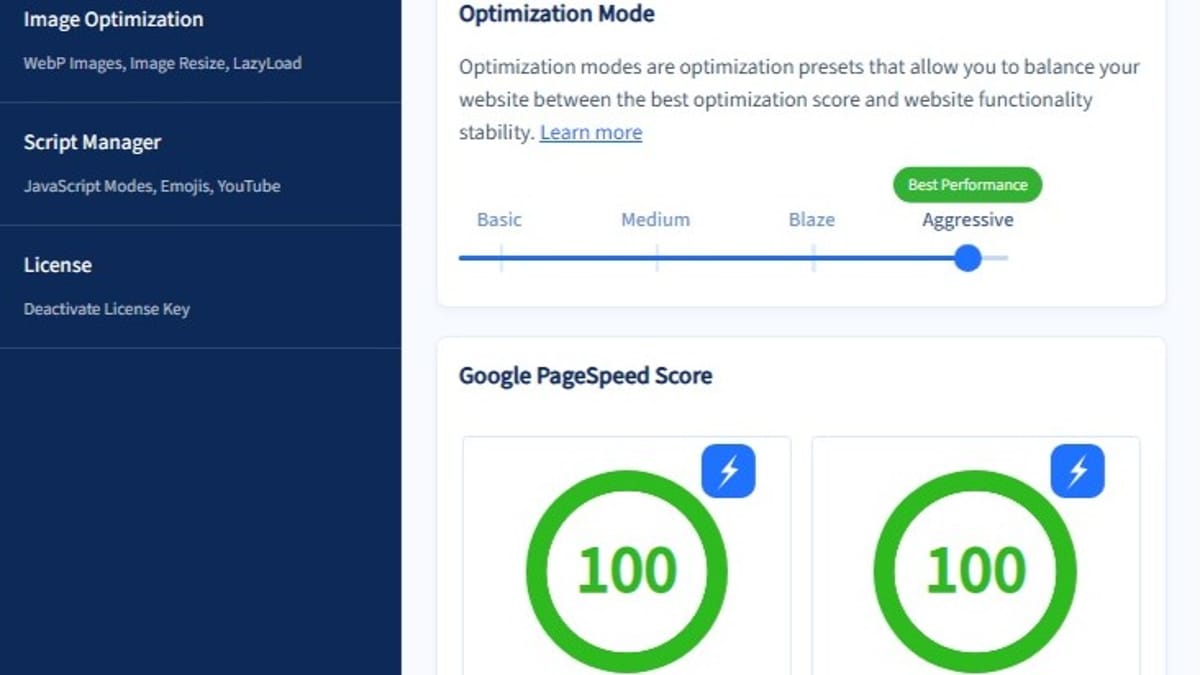
Berqwp DASHBOARD Settings
- Mode: Aggressive
- BerqWP CDN: enabled

Berqwp CACHE MANAGEMENT Settings
- Content Types: select all items
- Ignore URL parameters: default list (For DGR only, add: wprm_print)

Berqwp IMAGE OPTIMIZATION Settings
- WebP conversion: Max image width: 1200 px, Image quality: 80%
- LazyLoad images: enabled

Berqwp SCRIPT MANAGER Settings
- CSS optimization: Auto (or select another option to exclude some CSS scripts)
- JavaScript optimization: Auto (or select another option to exclude some CSS scripts)
- Preload font faces: enabled
- Disable emojis: enabled
- LazyLoad YouTube embeds: enabled
- JavaScript execution mode: Sequential Blocking Execution… (Default)
- Trigger interaction (ms-milliseconds): (empty)
- Trigger Note: Filling in this trigger interaction helped fix some things that required an initial mouse movement or tap. However, it reduced my performance metrics significantly. So, consider working on discovering what JS or CSS scripts need to be added to custom JS or CSS boxes instead of using “Auto”.

After Installing Berqwp Plugin
While you may see initial PSI improvements after the home page has been cached. It’s best to wait for the entire site to be fully cached. Know that the value of 100% doesn’t mean it’s done processing all caching. You’ll know ultimately if you scroll through and see no pages with a “Pending” status. The good thing is, it tends to cache the home page first.

Reviews
This optimization tool has had an early history of checkered reviews. However, when I bought it, it had just finalized it’s major “fixes”. Also, it has maintained it in recent months so, that’s why I wrote this post.
Alternative Caching Plugin & CDN
Conclusion
After installing and configuring the BerqWP plugin, experience the relief of improved performance and core web vitals scoring. It optimizes pages and posts fast. Also, the simple options to modify are available for final tweaking. For major adjustments or fixing issues, the Optimization Mode can easily be reduced.